 Liwu
LiwuHow to Limit MacBook Charging to 80%
2026-07-27
On an Apple silicon Mac with macOS Tahoe 26.4 or later, use Apple's Charge Limit if 80% is your target and you accept occasional automatic charges to 100%. On macOS 14 through Tahoe 26.3, or when you need a target below 80% or explicit control over full-charge events, use a reputable third-party limiter after reviewing its system access and removal path.
| Your Mac or requirement | Simplest option |
|---|---|
| Apple silicon, Tahoe 26.4+, 80%–100% is enough | Apple Charge Limit |
| Big Sur 11+ with a regular charging routine | Optimized Battery Charging may be enough |
| macOS 14–Tahoe 26.3 and you want a fixed target | Third-party limiter |
| You want a target below 80% | Third-party limiter |
| You do not want automatic full-charge events | Third-party limiter with explicit top-up behavior |
Apple's two options behave differently. Read the detailed comparison of Optimized Battery Charging and Charge Limit for their version requirements, status messages, overrides, and occasional full-charge behavior.
Choose the built-in option when it meets your needs
Charge Limit is the shortest path to a fixed 80% target on an Apple silicon Mac running macOS Tahoe 26.4 or later:
- Open System Settings → Battery.
- Select the information button next to Charging.
- Choose 80% for Charge Limit, then select Done.
macOS charges to within a few percentage points of the target and resumes after the battery drops more than 5% while connected to power. Choose Charge to Full Now from the battery menu when you need 100%. Apple also says the Mac may occasionally charge to 100% automatically to maintain accurate battery state-of-charge estimates.
If your Mac does not support Charge Limit but follows a regular charging routine, Optimized Battery Charging may be enough. It predicts when the Mac will remain plugged in and may delay charging past 80%; it is not a fixed target you choose.
Set a fixed limit with Liwu
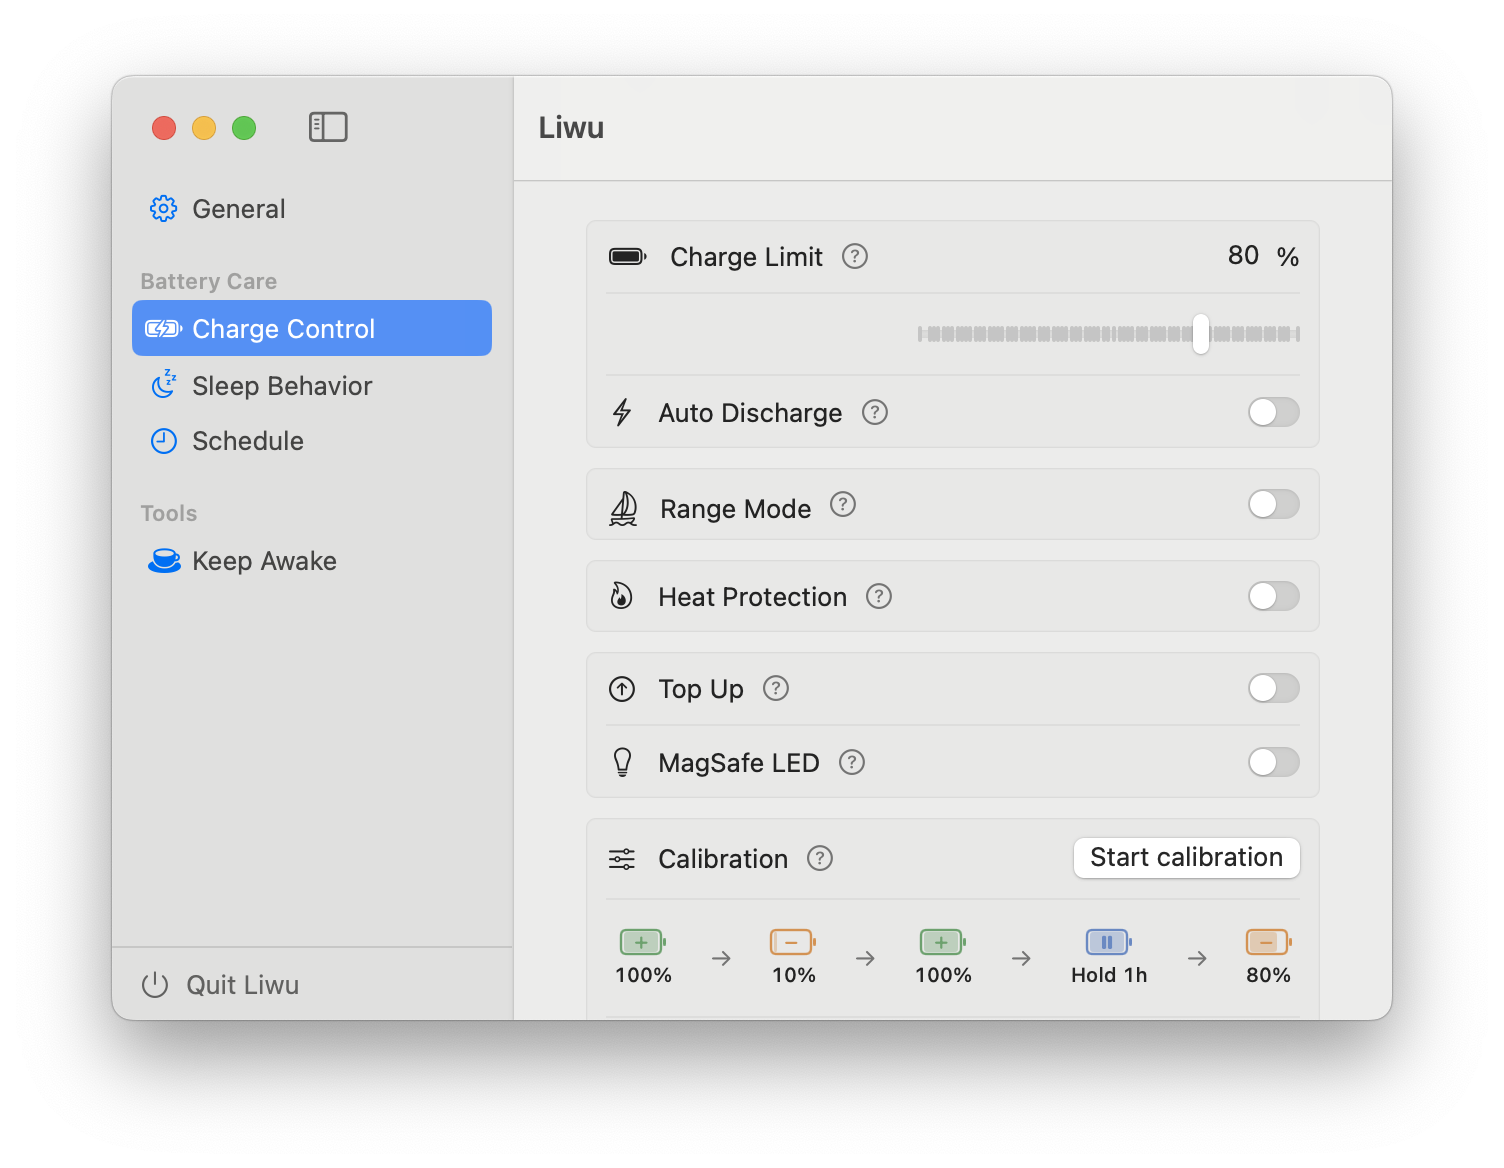
Liwu supports Apple silicon MacBook Air and MacBook Pro models running macOS 14 or later. To set a limit:
- Download and open Liwu; approve its helper when macOS asks.
- Open the menu-bar battery control.
- Drag the battery bar, or use the main-window slider and exact-number field, to choose 20% through 100% in 1% steps.
Before approving privileged access, use the MacBook charge limiter safety checklist to evaluate the download, signature, helper role, network boundary, conflicts, and removal path.
What happens at, above, and below the limit
- At the target: Liwu inhibits charging. While the adapter supplies enough power, it can power the Mac without continuing to charge the battery.
- Already above the target: normal use may lower the battery level. Basic limit mode does not force a discharge.
- Below the target: Liwu allows charging toward the target. An active heat pause, sleep rule, or Pro range-mode setting can intentionally keep charging off below that number.
If automatic discharge is enabled with Pro, Liwu can actively bring an above-limit battery down to the target. That is separate from the basic charge limit and is off unless the user enables it.
Sleep, Quit, and restart behavior
- Sleep: the active helper applies the selected sleep behavior; no settings window must remain open. The default stop-charging-during-sleep behavior is available in the free tier.
- Close a window: Liwu remains in the menu bar and charging control continues.
- Choose Quit: choosing Quit returns charging control to macOS and stops the helper. The limit is not enforced after explicit Quit.
- Restart or sign in: open Liwu again, or enable Launch at Login, to resume the saved configuration.
Use one charging controller at a time. If macOS Optimized Battery Charging or its built-in limit conflicts with Liwu, disable one controller and verify the result.
Free and Pro features in this workflow
The fixed charge limit, heat protection, and default stop-charging-during-sleep behavior are free. These are enough for the basic workflow described above.
Pro adds range mode, automatic discharge, Top Up, calibration, schedules, and MagSafe LED control. Those features change convenience or automation around the limit; they are not required to choose and hold a basic target. Advanced sleep and keep-awake modes are also Pro, while the default sleep rule remains free.
The runtime trade-off
Apple says battery chemical aging depends on a combination of factors, including temperature history and charging pattern. Its own battery features are designed to reduce time spent fully charged or otherwise reduce wear. That supports a modest conclusion, not a guaranteed lifespan result.
A lower limit trades unplugged runtime for less time at a high state of charge. An 80% target can be practical for a Mac that is usually near power, while a higher target may suit long unplugged days. There is no single correct percentage for every user, workload, temperature, or battery.
FAQ
Is 80% the best charge limit for every MacBook?
No. It is the lowest target Apple's built-in Charge Limit currently offers and a practical starting point for many plugged-in workflows, but the right balance depends on how much unplugged runtime you need and how the Mac is used.
Why is my MacBook above the Liwu limit?
Basic limit mode prevents further charging; it does not actively discharge a battery that already exceeds the target. Normal use can lower it over time, or Pro's optional automatic discharge can bring it down. Also check for another active charging controller.
Can I keep a MacBook plugged in all day with a limit?
A limit can reduce time spent fully charged, but it does not remove every source of battery aging. Temperature history, charging pattern, workload, and the runtime you need still matter.
Does the limit survive sleep and restart?
During sleep, the active helper applies the selected sleep rule. After a restart or sign-in, reopen Liwu or enable Launch at Login before expecting the saved configuration to resume.
Do I need to keep a Liwu settings window open?
No. Keep Liwu running in the menu bar, but the settings window can be closed. Choosing Quit is different: it intentionally restores normal macOS charging and stops the helper.